

How to Set Rearset Position for Track Riding

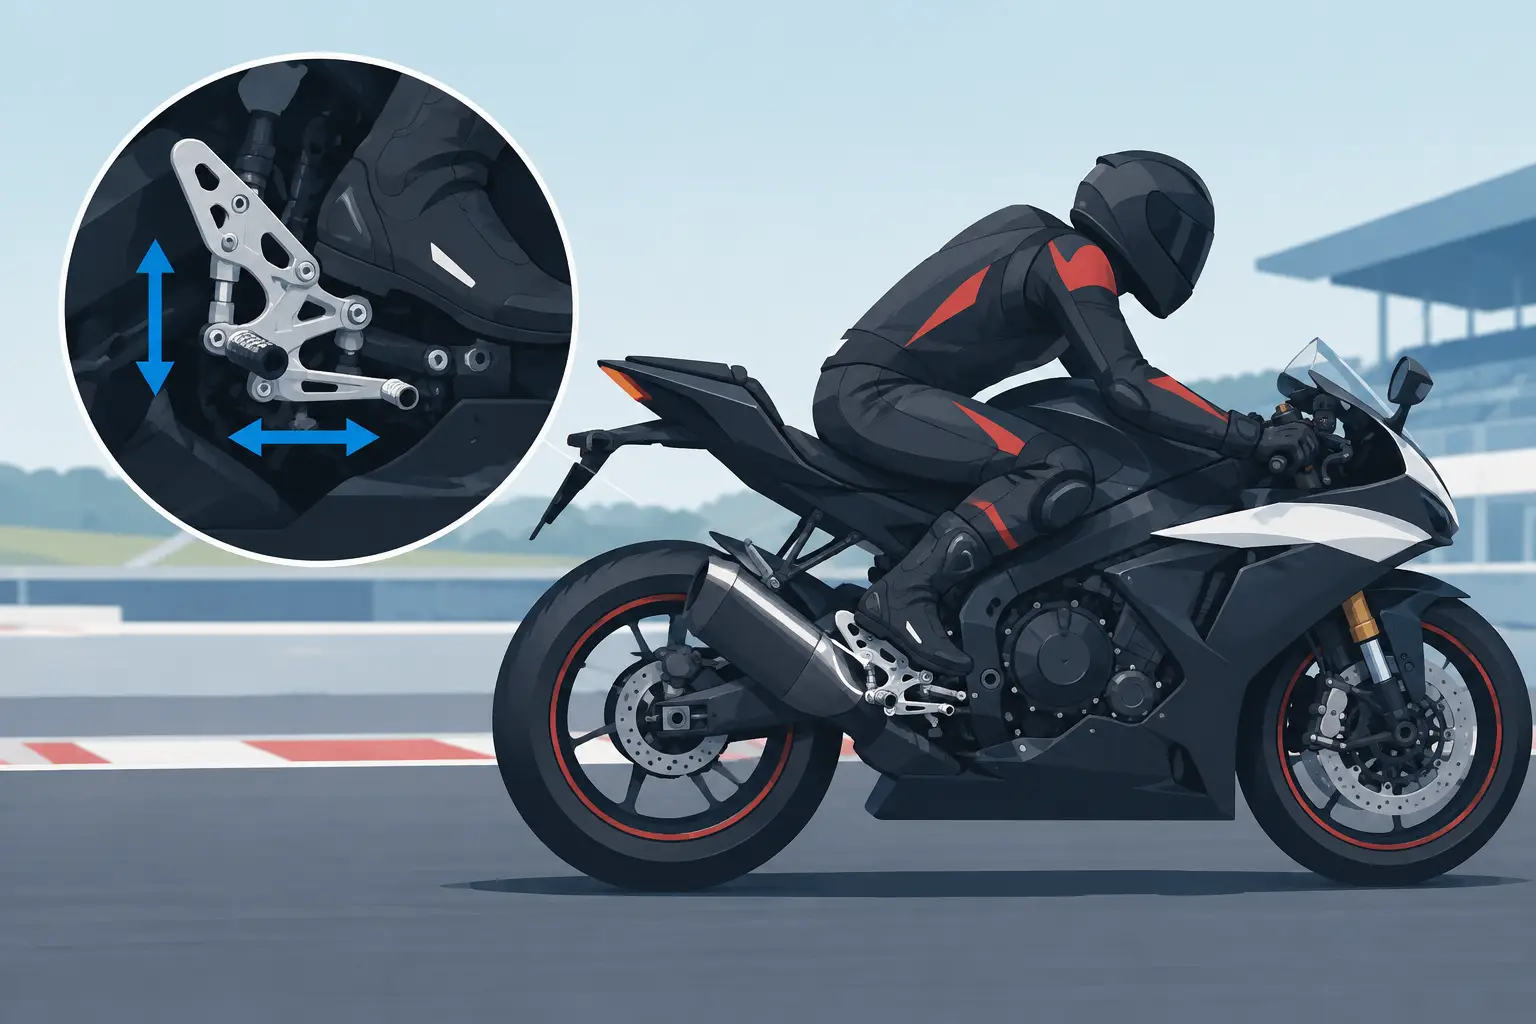
A rearset adjustment that looks aggressive in the paddock can be a liability at speed. Pegs set too high, too far back, or paired with poorly adjusted controls can reduce leg support, compromise shifting, and make braking inputs inconsistent. Knowing how to set rearset position means setting the motorcycle around your body, your riding style, and the clearance demands of the track – not chasing the most extreme mounting hole.
Quality adjustable rearsets give sport bike riders meaningful control over peg height, peg setback, shift pattern, and brake lever position. Used correctly, that adjustment can create a stronger connection between rider and machine under braking, through the corner, and on exit. Used carelessly, it can create knee pain, missed shifts, or a rear brake pedal you cannot reach when it matters.
How to Set Rearset Position: Start With a Baseline
Begin from the rearset manufacturer’s recommended neutral or middle position. If the rearsets were installed by a previous owner, do not assume the current settings are intentional or correct. Measure and note the existing position before changing anything: peg height relative to stock, setback, shift lever height, brake pedal height, and any eccentric or linkage settings.
For most track-day riders, a moderate rise and setback is the right starting point. Moving the pegs up improves ground clearance and usually gives more room to move your body off the inside of the bike. Moving them rearward can help a rider brace against acceleration and reduce the feeling of being pushed toward the tank under hard braking.
But more is not automatically better. Very high, far-back pegs tighten the knee angle and can make it difficult for taller riders to hold a relaxed lower body position. A cramped cockpit also limits how effectively you can load the outside peg, a key part of staying stable while leaned over. Street riders face another trade-off: a race-focused position may be uncomfortable during longer rides and can make low-speed control more awkward.
Set both sides identically. Measure from a fixed point on the frame or swingarm pivot area rather than trusting visual alignment. If your rearsets use multiple plates or offset mounting points, confirm that the left and right assemblies are in the same hole positions before touching the controls.
Choose Peg Height Before Setback
Height has the largest effect on lean-angle clearance and knee bend. Start by deciding whether your priority is clearance or comfort. If you are dragging stock pegs at track pace, move the rearsets upward first, typically one adjustment position at a time. A rise of roughly 15 to 25 mm is a sensible initial range for many sport bikes, although the available adjustment and best setting depend on the motorcycle and rearset design.
Once height is close, adjust setback. A small rearward move can give a better platform during braking and corner exit. Too much setback shifts your knees behind your hips and can make transitions feel restricted. Riders who are tall, have limited hip mobility, or ride a compact modern supersport may need less setback than they expect.
Your body position should decide the final setting. Hang off the bike in riding gear, with the motorcycle supported securely. You should be able to put the ball of your outside foot on the peg and maintain pressure through it without locking your hip or forcing your knee into the tank. On the inside, you should be able to rotate your foot so the toe slider clears the pavement while your boot remains naturally positioned near the controls.
Match Rearset Position to Your Riding Goals
A race bike and a fast street bike do not need the same compromise. Track riders generally benefit from more clearance and a firmer lower-body platform. Riders on bumpy public roads may prefer a slightly lower, less rearward setting that gives them more leverage and comfort without sacrificing control.
If your priority is track performance, look for a position that lets you grip the tank with your outside leg while keeping your torso relaxed. You should not need to support your weight through the handlebars. During heavy braking, the pegs should give you a stable point to push against, helping reduce arm pump and allowing more precise front brake feel.
If your priority is aggressive canyon riding, avoid setting the bike up so tightly that shifting and rear braking become difficult in normal boots. Maximum lean clearance is not useful if your knees ache after 45 minutes or if the brake pedal sits too high to use confidently in a downhill corner.
Rider dimensions matter as much as bike model. A shorter rider may favor slightly less setback to preserve easy access to both controls. A taller rider may need additional height for cornering clearance but less rearward movement to avoid an overly acute knee angle. There is no universal race setting, even among riders on the same motorcycle.
Set the Shift Lever and Brake Pedal Separately
The peg position is only half the job. After every rearset adjustment, reset the shift and brake controls to suit the new foot location. Do not leave the levers where they happened to land after changing mounting holes.
Set the shift lever so your boot can slide under it without lifting your foot far from the peg. With standard shift, the lever should sit close to the natural height of your toe when your foot is resting on the peg. If it is too low, you will have to point your toe excessively to downshift. If it is too high, upshifts can become slow and inconsistent. Riders using race shift should apply the same principle in the opposite direction: minimal ankle movement, positive lever engagement, and no interference with the fairing or engine case.
Adjust linkage length carefully. Keep the shift rod as straight as practical, avoid binding through the lever travel, and verify that every locknut is tightened. On bikes with a quickshifter, check that the sensor is installed in the correct orientation and that the linkage does not preload it. A poorly aligned rod can cause false shift cuts or missed shifts that look like an electronics problem.
Set the brake pedal for immediate access, not constant contact. Your boot should reach the pedal with a small, deliberate ankle movement. A pedal positioned too high invites accidental rear brake pressure when you are moving around on the bike. Too low, and it becomes difficult to find during trail braking or when the bike is leaned over.
After setting pedal height, confirm brake free play and master-cylinder actuation. The rear brake must fully release when your foot is off the pedal. Spin the rear wheel on a stand, apply and release the brake, then verify that it turns freely again. If your bike retains a brake-light switch for street use, test that function after adjustment as well.
Test the Setup Methodically
Do not make three changes and then try to diagnose the result after one session. Adjust one variable at a time, then ride enough laps to feel the difference. Start with peg position, then tune the shifter and brake pedal. Record each setting in your phone or setup notebook, including the mounting holes used and the control positions.
During the first session, focus on a few clear signals. Can you keep weight off the bars under braking? Can you load the outside peg and lock into the tank through long corners? Are upshifts and downshifts clean without looking for the lever? Can you apply rear brake without changing your body position? Those answers matter more than whether the pegs appear high in the garage.
Stop and inspect the hardware after the session. Rearsets experience constant vibration, hard braking loads, and repeated boot contact. Confirm mounting bolts, peg bolts, linkages, toe pieces, and master-cylinder hardware remain tight. Use the torque values and thread-locking guidance supplied by the rearset manufacturer, not a generic guess.
Common Rearset Setup Mistakes
The most common error is copying another rider’s position without considering height, boot size, flexibility, or riding technique. The second is treating the pegs as the only adjustment while ignoring lever ergonomics. A high-spec rearset cannot deliver clean control if the shifter is unreachable or the brake pedal drags.
Also check full-range clearance before riding. Turn the bars from lock to lock, cycle the suspension if possible, and inspect for contact between your boots, levers, exhaust, fairing panels, side stand, or engine covers. Confirm the shift linkage clears the sprocket cover and that the brake pedal cannot contact any component before reaching full braking travel.
The right setting should disappear beneath you. When the pegs support your body, the controls fall naturally under your boots, and the bike has the clearance to carry lean angle, you stop thinking about the rearsets and start focusing on braking markers, turn-in, and drive. That is the position worth keeping – then refine it one measured adjustment at a time.